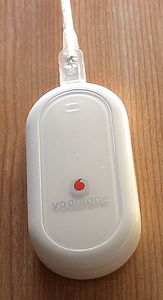
Howto | Huawei E220 3G USB Modem
11 May 2009
Introduction
Following a failure of our Internet connection, I hastily cobbled together a new proxy server using my 3G modem. The reason I did not simply add the modem to our existing IPCop solution, was because IPCop currently only supports a single Red/WAN interface. The IPCop FAQs specifically warn against attempting multiple interfaces.
There were many instructions on the Internet, but in reality it proved to be quite straightforward. I followed these instructions, varying them slightly for Vodafone:
This was tested on IPCOP version 1.4.18, older versions may not work.
Warning
These are my own personal notes, they relate to a UK Vodafone install, you would need to alter instructions for your location and telco.
Configure Kernel modules
When building your IPCOP, you need to set the IPCOP to use a network adaptor for the Green Interface and a Modem to use as the Red Interface.
From the command prompt logged on as root on the IPCOP you need to edit the /etc/modules.conf file.
# nano /etc/modules.conf
Add the following lines at the bottom:
alias char-major-188 usbserial
options usbserial vendor=0x12d1 product=0x1003 maxSize=4096
Then save the file and access (Press CTRL + O and press enter then press CTRL + X).
Web Console - Modem
Log onto the web console and choose the Network menu and Modems. Change INIT to:
AT+CGDCONT=16,"IP","internet"
Web Console - Dial-up
Now select Dial-Up.
Interface = "Modem on USB0"
Enter Number = "*99#"
Username = internet
Password = internet
Authentication method = PAP
DNS = Automatic
Profile name = Vodafone
Press “Save”.
Test
Connect your 3G modem into the IPCOP box and reboot.
You should now be able to connect to the net using your 3G dongle.
References
Conclusion
Amazingly it only took a couple of hours, including building a new PC, and it worked beautifully. Unfortunately, or perhaps that’s fortunately, no-one will ever know how good it was, because our Internet connection started working again about 15-minutes after I had completed it!
