Howto | Install Debian Squeeze With Raid1 + LVM
01 Mar 2011
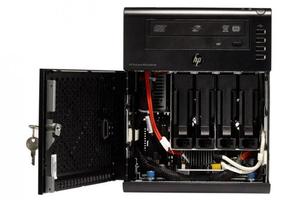
I’ve just bought a new HP N36L Microserver, for £210 with £100 cashback. It came with a 250gb SATA, so I added a second 250gb SATA; so that I could have a simple software RAID array. I also added 2gb of Crucial RAM.
When the server arrived, I was surprised to find it had RAID built into it, but my understanding is that this is FakeRAID and thus should be avoided at all costs. If you were particularly interested in that option, with particular reference to Windows Home Server (yikes) then this page may be helpful.
I plugged in my wonderful IODD ISO drive and selected Debian Squeeze AMD64 netinstall, and off I went. When it came to the partitioning, you need to carry this out manually, in the following order:
- Partition both disks as follows:
- Create boot primary partition (about 500mb)
- Set mount as /boot and make bootable
- Create partition using most of the rest of the first drive (e.g.
247gb)
- Set partition as Use as physical volume for RAID
- Create boot primary partition (about 500mb)
- Configure software RAID
- Create MD Device, RAID1, 2 devices, 0 spare devices
- Select the RAID partition on each drive
- Create Physical Volumes for LVM
- Create volume group
- Create suitable volumes for your systems, e.g. swap (2 x
RAM, root (10GB or so), home (to your taste), usr (2gb+), var
(2gb+), tmp (1gb+).
- it is a good idea not to use the whole space, as the whole benefit to LVM is being able to then add available space into any volume
- I also created a large volume for /var/lib/vz/private, as this will be an openvz server.
- Partition disks
- Set each LVM volume to use the appropriate file system type, e.g. ext3 or ext4, and set the appropriate mountpoint, e.g. home should be /home etc, swap should be allocated to swap space etc
I found this howto on LVM + RAID for debian-installer most useful but, providing you follow the logical progression, it really is not as difficult as it seems.
After the partitioning, I continued with the installation, removing all options including “Standard System” from the software profiles; so that I basically installed a base system, which is how I prefer it.
Next I installed: sudo, GNU Screen, openssh-server, vim, fcheck, locales, localepurge, apt-file, apt-show-versions and nullmailer (ssmtp is better if your mailserver requires secure authentication). Doubtless you have your own favourite packages to install!
Next step will be to configure as a small openvz server, and migrate the virtual machines off my old server (which I will be commissioning as a storage server).
